Problem: Puffco Peak Does Not Charge via Micro USB Port
Our Puffco came to us defective, from a friend: it wouldn’t charge. My first task was a disassembly, which you can read about here. I determined the charging circuit in my puffco was defective, and set out to solve the problem.
I reached out on Reddit after my teardown video to see if anyone had more information. Reddit user MAXVapor710 posted this:
… The other possible scenario is a bad charge controller, which requires surface mount rework on a very small component. The Charge Controller is a Monolithic Power Systems MP2615 https://www.monolithicpower.com/en/mp2615.html
These usually get very hot when they are not working correctly, easily diagnosed with a thermal cam or a sensitive finger.
We do repair out of warranty Peaks, and offer a battery replacement service, if you have any more questions let me know or email support@maxvapor.com
MAXVapor710 – Reddit – https://www.reddit.com/r/puffco/comments/e5q2y4/opening_up_a_puffco_peak_to_fix_full_teardown/
With that information, I knew I didn’t have the right tools to do a surface mount rework of the chip.
I opted for bypassing the internal charger altogether in favour of an external third party charger. There are a few choices here, and this is one of those times where you get what you pay for.
I learned from MaxVapor that this evaluation board is the correct replacement for this hack. It uses the MP2615 and has large pads to solder to, and charges the Puffco battery the exact same way that the factory circuit that has died used to.
Option 1 (Good) – DC Wall Wart aka Dumb Charger
Do you have a bin of abandoned wall adapters in a closet somewhere? Perhaps under the stairs or in the garage? Go find it and look for an AC to DC converter rated at 7.5 volts and 1 amp. Slightly higher voltage and amperage may work, but I wanted to err on the side of caution.
One of these multi-voltage adapters should work, but again mind the specs – I don’t know what might happen if the rated amperage is too high.

If either the voltage or amperage is too high, you can damage your device and the batteries – potentially leading to a fire and a new paperweight instead of a fixed Peak. Please be careful, and only proceed if you are confident in your decision.
I only suggest this solution if for some reason you already have a AC-DC adapter of the correct specifications, or cannot acquire a smart charger.
Option 2 (Better)- Smart Charger
With a smart charger, the risk of overcharging or damaging your batteries goes down a lot. These chargers measure the voltage of the battery, adjusting the amount of energy delivered to both maximize the lifetime of the battery and the safety when doing so.

I use a fancy charger like the one above, but this one from Amazon should work too. You will need to make an adapter to go from the charger to the barrel connector if the charger doesn’t come with one.
This is different for every charger and whichever connector you choose to add.
Option 3 (Best) – Professional Repair
If you are considering this mod, but you aren’t confident to get it done: Consider reaching out to the folks at MaxVapor for a professional repair or parts. Puffco Parts, Service, Repair, and Upgrades by MaxVapor
A representative of Max vapor is the user who reached out on Reddit with the information about which component failed. I have no other affiliation, or business experience with them – but I recommend MaxVapor based on my limited interactions so far.
The 3D Model

Based on measurements I made, this model was designed over the course of a few days. It can still be improved upon, and I will happily share my working files with anyone who requests. Grab the 3D print files from Thingiverse:
The thingiverse page has two .stl files, the second file being the bottom cap for the base.
There are a few areas that require support for printing, but your printer will be different than mine – so adjust accordingly. I printed using PLA and have not had any issues with my base in the months I’ve used it.
The screw posts in the model ended up weak in my print, and eventually snapped off. This wasn’t an issue, as the tight fit of the base cover plate allows it to snap in place easily.
The Hack
Step 1: Disassembly
You will probably want to watch my first video on how to get into the Puffco body.
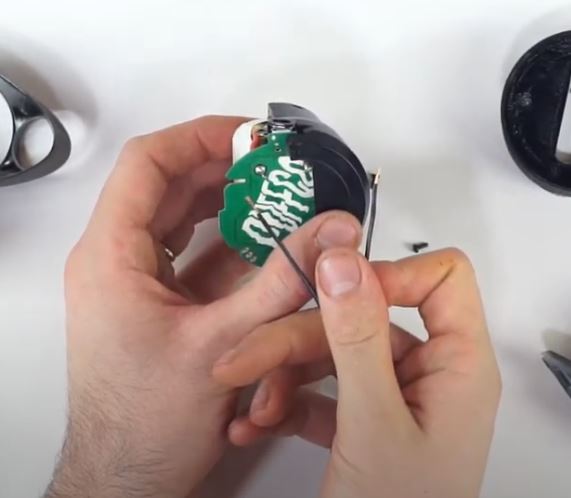
Step 2: Add Wires to the Positive & Negative Pads of the Main Board
Once inside your Puffco vape, it’s a simple process of adding a positive and negative wire onto the pads found on the main board. This is done using solder and a soldering iron to make a strong electrical connection.
The red wire, coming from the battery is positive (+) and the black wire is negative (-). It’s important that you lay the wires flat against the circuit board to solder them, otherwise they will be in the way when you attempt to close the case back up.
Step 3: Reassemble your Peak with Wires Sticking out the Bottom
With the wires attached to the main board, you can close the plastic back up and route the wires down through the rectangular opening that remains. Do not reinstall the fancy metal plate on the bottom of your Puffco. Store it in a safe place, you don’t need it if you’re using my .stl files for the 3D printed base.
Step 4: Attach the 3D Printed Base Using Double Sided Tape
Using some double sided foam sticky tape, you can affix the 3D printed base to the Puffco and feed the wires into the housing.
Make sure you use double sided tape that has a nice puffy foam core. My .stl files are not tight enough tolerance to get a great stick with thin double sided tape.

Step 5: Solder the DC Jack to the Wires
Again, we will use solder to connect the new wires we installed to a DC barrel jack. I used this type of low voltage barrel connector from amazon:

Use heat shrink around any soldered connections to prevent dangerous short-circuit conditions.
Step 6: Test Your Fixed Puffco Peak
With the DC jack connected and installed, you can test your work to see if your battery still charges. I tested mine by soldering the pack directly to the board, and plugging it in to charge – only proceeding once I verified the fix would work.
Your Puffco should charge and work again!
3 replies on “Repairing a Puffco Peak”
Have you tried this with a Qi wireless charging coil?
Nope!
hello,
watched your video on how to tear down the Puffco peak and it lead me to finding my problem, but i was wondering if you knew where to find the chips on the battery board i cant find them anywhere. I read off the chip lono2 and c1934a. Can you help?